A Voucher is a document that contains details of a financial transaction. For every transaction, you can use appropriate Tally Voucher to enter the details into the ledgers and update the financial position of the company.
Mainly there are two types of Voucher Entry:
- Accounting Vouchers
- Inventory Vouchers
You can set the configuration for entry to allow only those features, which you require while entering vouchers.
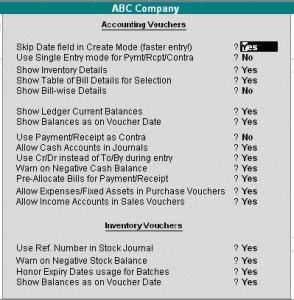
In the Voucher entry configuration, Selectively set only those features to Yes. (This is further explained under advanced usage).
Go to Gateway of Tally> F12: Configure> Voucher Entry
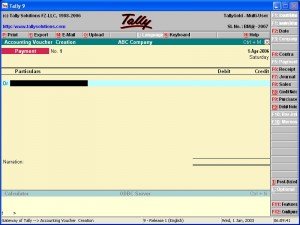
VOUCHER CREATION SCREEN
This screen is divided into three parts
- Main Voucher Entry Area
- Button Bar Area
Main Voucher Entry Area
The Main Voucher Entry Area is where you enter all your transaction. This area provides fields for Date, Ledger Name and Amount as well as additional pop-up screen that are dependent on your voucher configuration and the nature of transaction you make.
Button Bar Area
The Button Bare Area displays buttons that provide quick interaction with Tally. Buttons that are relevant to current task are enabled and the other buttons are disabled.
Calculator Area
The Calculator area provides the calculator functions where you can enter any number of mathematical formulae for complex calculations.
Mouse conventions
| Command | Action |
| Click | Press the left mouse button |
| Double-click | Press and release the left mouse button twice, without moving the mouse pointer off the item |
| Choose | Position the mouse pointer on the items and click the left mouse button. |
| Select | Position the mouse pointer on the item and double-click the left mouse button. |
| press | Use the keys on the keyboard in the combination shown |
Switching between Screen Areas
The Main Voucher Entry Area is the active area by default on the Voucher Creation screen. Press Ctrl+No to navigate to the Calculator Area and press Crtl+M to toggle back to Main Voucher entry Area. A green bar highlights the active area of the screen.
Note: Press Alt+C to use calculator when at amount field.
SPECIAL KEYS FOR VOUCHER NARRATION FIELD
ALT+R: Recalls the Last narration saved for the first ledger in the voucher, irrespective of the voucher type.
CTRL+R: Recalls the Last narration saved for a specific voucher type, irrespective of the ledger.
Checking the accuracy of the vouchers
To check the accuracy of the vouchers that you have entered:
- Go to Gateway of the vouchers that you have entered:
- Select F2: Period from Button Bar and enter the period for which you want to view Vouchers.
Note: It defaults to the current date only but you may display all the transactions for a particular period.
- Select F1: Detailed
You can check the vouchers for correctness. Toe correct a mistake, position the cursor on the item where you have found the error and press Enter. Tally displays the voucher details for alteration. The alteration facility is subject to security and access rights. All alterations are available for audit.
TYPES OF VOUCHERS
Tally is pre=programmed with a variety of accounting vouchers, each designed to perform a different job.
The standard vouchers are:
- Payment Voucher
- Receipt Voucher
- Contra Voucher
- Sales Voucher
- Sales Orders
- Sales Vouchers/Invoices
- Delivery Notes
- Rejection In
- Purchase Voucher
- Purchase Orders
- Purchase Voucher
- Goods Receipt Notes
- Rejection Out
- Journal Voucher
- Credit Notes
- Debit Note
- Journal
- Memo Voucher
- Reversing Journal
- Stock Journal
- Physical Stock
You can alter these vouchers to suit your requirement and also create new vouchers.
For example, if you wish to distinguish between cash and bank payment you can create vouchers to do this.
The function of each voucher type is explained.
CONTRA ENTRY (F4)
According to accounting rules, Contra Entry is a transaction indicating transfer of funds from:
- Cash account to Bank account
- Bank account to Cash account
- Bank account to Bank account
To view the Contra Voucher Entry Screen:
- Go to Gateway of Tally > Accounting Vouchers
- Select F4: Contra from the button bar or press F4
Note:
- Use the buttons on the right-hand side of the screen to Explore the Potential of Tally.
- Press [Enter] wherever the cursor is placed to know the Depth of Tally!
CONTRA ENTRY – SINGLE ENTRY MODE
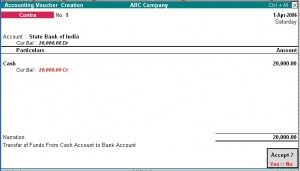
Contra Voucher creation screen appears in Single Entry Mode by default. You are prompted to choose the account, which will receive the amount (the ledger that has to be debited).
To view Contra Voucher creation screen in Single Entry mode
Go to Gateway of Tally> Accounting Voucher > Select F4: Contra
For example, to transfer funds from Cash Account to Bank Account:
- Debit the Bank Account
- Credit the Cash Account
The ledger selected in Account State Bank of India is the destination ledger and it is debited
Advantages of Single Entry Mode:
- Faster data entry.
- Selection of:
- Multiple Ledgers (to be credited ) with a Single Ledger (to be Debited) OR
- Multiple Ledgers (to be debited ) with a Single Ledger (to be Credited)
CONTRA ENTRY – DOUBLE ENTRY MODE
To select multiple Debit and Credit ledgers in the Double entry mode, set Use Single Entry Mode for Payment/Receipt/Contra to No in F12: Configure.
Entering in Double Entry Mode
- Go to Gateway of Tally > Accounting Vouchers
- Select F4: Contra from the Button Bar or press F4.
The entry displayed in Single Mode appears as follows in Double entry mode:
Here cash is transferred from Cash account to Bank account.
Use F2: Date to change the date of the voucher.
If you require Dr/Cr instead of To/By -> as explained in the Configuration section, activate the required feature in F12: Configure.
- In the above example, we have changed the date to 2nd April 2001 and we have Dr/Cr instead of To/By.
- As the Contra voucher is active, the Buttons of the other voucher types of Payment, Receipt, Journal, Sales and Purchase are visible
PAYMENT ENTRY (F5)
To view the Payment Voucher entry screen:
- Go to Gateway of Tally > Accounting Vouchers
- Select F5: Payment from the Button Bar or press F5
By Default, the Payment Entry screen appears in Single Entry Mode (The option Use Single Entry mode for Pymt/Rcpt/Contra is set to Yes in F12: Configure).
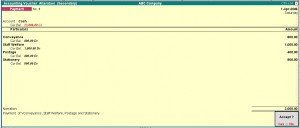
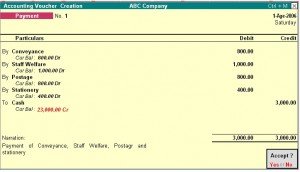
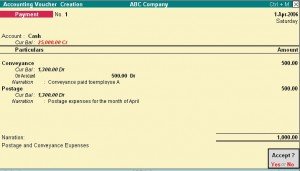
For example, the company settles expenses of conveyance, staff welfare, postage and stationery through cash all in one voucher. The entry appears as shown below.
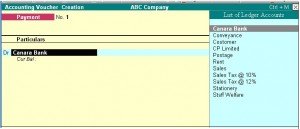
You are prompted to choose the cash or bank ledger, which will pay the amount (the credit ledger).
PAYMENT ENTRY – DOUBLE MODE
If you want the payment entries to be entered in double entry mode, then set Use Single Entry Mode for Payment/Receipt/Contra to No in F12: Configure
To entry the payment entry in Double Entry Mode,
Go to Gateway of Tally > Accounting Vouchers > F5: Payment
A Payment entry entered in double entry mode appears as shown,
Advantages of Double Entry Mode
- You can select any number of ledgers of ledgers to be debited and credited in the payment voucher.
- You can view on the screen whether a ledger is debited or credited thus allowing you to cross- verify.
PAYMENT ENTRY – SINGLE NATTATION
If you want the narration details for every ledger you debit or credit (Single narration), you can configure Tally’s Narration details accordingly.
To do so,
- Go to Gateway of Tally >Accounting Information > Voucher Types > Alter
- Select the required Voucher Type.
- Enable the option Narrations for each Entry and accept the details.
- Return to Accounting Vouchers on Gateway of Tally and enter a payment voucher as required.
Give below is an example of a Payment transaction with narrations for each entry:
The entry consists of both common narration and narrations for each entry. In case of multiple debit/credit entries, you can give single line narrations separately for every ledger account selected.
PAYMAENT / RECEIPT AS CONTRA
The Contra Voucher is used to indicate transfer of funds from
- Bank account to Cash account
- Bank account to Bank account
- Cash account to Bank account
However, for users who wish to use the Payment and Receipt vouchers for this nature of transaction, Tally has the flexibility of defining Payment and Receipt behaviour as per Contra voucher.
- Go to Gateway of Tally > Accounting Vouchers
- Select F5: Payment from the Button Bar or press F5.
- Activate the option Use Payment/Receipt as Contra to Yes in F12: Configuration screen.
- Accept the screen and save.
If Use Payment/ Receipt as Contra option is set to No in F12: Configure screen, the each and bank accounts will not be displayed.
WARN ON NEGATIVE CASH BALANCE
You can configure Tally to prompt you with a warning when the Cash ledger reaches a negative balance.
To activate Warning on Negative Cash Balance:
- Go to Gateway of Tally > Accounting Vouchers
- Activate the option Warn on Negative Cash Balance to Yes on the F12: Configure screen.
- Accept the screen to save.
Example:
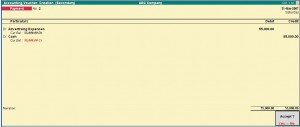
Let us assume a cash balance of Rs. 54000 and you need to make a payment of Rs. 55000 towards advertising expenses. This results in a negative balance.
Tally prompts you with a box that displays the warning and also the credit cash balance in RED colour. This will help you decide whether to proceed with the entry or not.
CHEQUE PRINTING
You can choose to print cheques directly from Tally. Cheques will be printed while printing a Payment Voucher.
Enabling Cheque Printing
- Go to Gateway of Tally > F11: Features > Accounting Features
- Set Enable Cheque Printing and Set/Alter Cheque Printing Configuration to Yes.
Company Operations Alteration screen appears as shown.
Once the option Set/Alter Cheque Printing Configuration is activated to Yes, you will get the following screen.
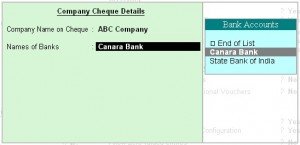
Company Name on Chaque:
To print the company name on the cheque for signature purposes, mention the name of the Company (for example, ABC Company). If you do not want Tally to print the name, you can leave it blank. Many banks give cheques with your company name printed.
Name of Banks
Select the Bank from the Bank accounts list
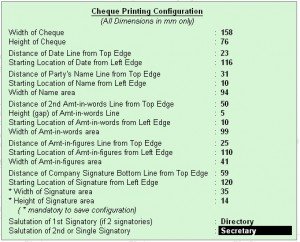
You will have to fill in the dimensions of th cheque. Tally accepts user defined cheque dimensions. Take the bank’s cheque book and measure the dimensions of a cheque leaf carefully in millimeters and fill in the above form. You may need to correct it after trying out a couple of cheques so that the positioning is accurate. The placing of the cheque in the printer also determines the printing. To avoid mistakes trial could be made on photocopies of a cheque before using an actual cheque leaf.
Note: Salutation fields are for signatures and naturally follow the Company name (for example, Director)
Note: All dimensions must be more than 0 for cheques to be successfully printed.
For ABC & Company
Director
If your cheque has two signatories, both can specified. Both could be the same salutation or different. For example, one could be Director, the other could be Secretary.
Give details of whatever you are using currently. Many banks will pre-print both the company name and the salutation in which case you can leave them blank.
You are now ready to print the cheque. Remember that this option is available only for the banks for which you have Ledger account.
PRINTING CHEQUES
After making the desired setting to print the cheque,
Go to Gateway of Tally > Voucher Entry > F5: Payment
Note: Cheque Printing option is available only forms Payment Voucher.
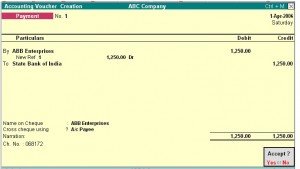
Name on the Cheque
You debit the party and give the bill reference details if any. Credit the bank for which the cheque dimensions were set up. In this example it is the State Bank of India. The name of the Debited party account appears next to the field Name on the cheque by default. You can change the name on the cheque if necessary.
Cross Cheque using
This is filled in by the most common words used- Account payee. You may change it if required.
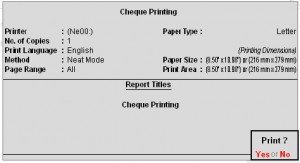
Enter the Cheque Number (Ch. No.) and save the save the Voucher. Then, you will get the Cheque Printing sub-screen appears as shown below:
Select Yes to print the cheque.
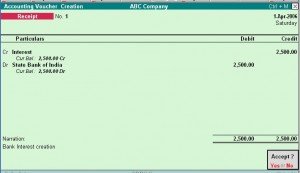
RECEIPT ENTRY (F6)
Transactions accounting for money received are entered into Tally through the receipt voucher.
To view the Receipt Entry screen:
- Go to Gateway of Tally > Accounting Vouchers
- Select F6: Receipt from the button bar or press F6
Similar to Payment and Contra Vouchers, the Single Entry Mode appears for Receipt Entry as well.
For example, if your company receives money from a customer for an earlier transaction:
- Credit the customer account and debit the Cash account, if you receive cash or
- Debit the Bank account where you need to deposit the money, if you receive cheque.
The entry in double-entry mode is displayed as shown below:
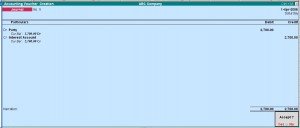
JOURNAL ENTRY (F7)
Journal entries are used to adjust the debit and credit amounts without involving the cash or bank accounts. Hence, they are referred to as adjustment entries. To go to the Journal Entry Screen:
- Go to Gateway of Tally > Accounting Vouchers
- Click on F7: Journal on th Button Bar or press F7 key
For example, there may be entries made for interest accrued or interest to be paid. If a party is involved in such a transaction the entry will be:
- Debit the Party
- Credit the Interest Account
The entry appears as shown below:
Note: Journal entries are usually used for finalization of accounts.
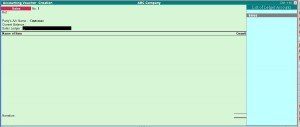
CASH ACCOUNTS IN JOURNALS
Journals are adjustment entries, which do not involve Cash account and Bank account. However in many cases companies use journal to account for day-to-day transactions where Cash or Bank accounts are required.
- Set Allow Cash Accounts in Journals to Yes in F12: Configuration.
- Go to Gateway of Tally > Accounting Vouchers> Select F7: Journal
Note: All Cash accounts and Bank accounts are displayed in the List of Ledger Accounts. Accordingly the journal entry has to be mode.
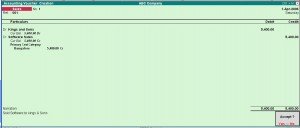
SALES ENTRY (F8)
Sales vouchers are used when the company sells some goods to customers.
To view the Sales Voucher Creation Screen:
Go to Gateway of Tally > Accounting Vouchers >Select F8: Sales.
For example, the company sells some software on credit. In this case, the company has to account for Sales Tax separately, if tax has been collected on the transaction.
The screen appears as shown below:
When a sales transaction is made, a document detailing the transaction (item name, text etc) has to be given to the buyer or debtor of purchase by him. This document is called “Invoice” or “Bill” or “Cash Memo”. Tally provides the options creating Invoices.
ENABLING INVOICING
- Set Allow Invoicing to Yes in F11: Features
- The Sale Voucher Creation Screen appears as Invoice by default.
- Go to Gateway of Tally > Accounting Vouchers > select F8: Sales
Sales entries can be made in the Voucher as well as Invoice Formats.
Invoicing and sales invoicing are almost the same as sales voucher entry. The advantage of using the invoice format for sales entry is that it allows automatic calculations of taxes and duties (ledger accounts classified under the group ‘Duties & Taxes’).
To enable automatic calculations of taxes and duties:
- Set Calculate Tax on Current Sub-total to Yes in F12: Configure on the sales invoice screen
- Accept the screen to save the voucher.
The default Sales Invoice screen appears as shown below.
When you start entering the voucher, Tally prompts for the Sales Ledger to be allocated.
Any number of stock items or account ledgers can be selected one after another to enable faster data entry. To activate this:
- Set Use Common Ledger A/c for Item Allocation to Yes in F12: Configure on the invoice entry screen.
- Accept the screen to save the voucher.
TYPES OF INVOICE
There are two types of Invoices:
Sales Item Invoice – allows you to select Items for invoicing
Sales Account Invoice – allows you to select Ledger for invoicing
SALES ITEM INVOICE
Invoicing is generally used for sale of stock where the details of the items sold are listed. Selecting the Item Invoice allows you to select the stock items that need to be invoiced. Trading and manufacturing organizations commonly use this format.
On the Sales invoice screen, click on the button Item Invoice which is displayed on the Button Bar on the right side of the screen and the Sales Item Invoice appears as the own below:
Tally’s Item Invoice mode displays the list of stock items, which can be invoiced as required.
Note: The Item Invoice button toggle with Account Invoice.
SALES ACCOUNT INVOICE
Sales Account Invoice is generally used by professionals such as doctors and consultants who require to invoice for certain services provided such as consultancy charges, professional fees.
Trading and manufacturing organizations also use the Account Invoice for invoicing service changes.
On the Sales entry screen, click on Acct Invoice button which is displayed on the Button Bar on the right-hand side of the screen to display the Sales Account Invoice screen as shown.
Tally’s Account Invoice mode displays the list of ledger accounts, which can be invoiced as required. This is unlike Item Invoice where Tally displays the list of stock items.
Note: The Acct Invoice button toggles with Item Invoice.
SALES AND PURCHASE VOUCHER ENTRY
In Accounts-with-Inventory Companies where Tracking Numbers is NOT activated
You do not get the voucher types Receipt Note and Delivery note in the Sales and Purchase Voucher sub-menus.
In addition to the above particulars that are applicable for all types of vouchers, sales and purchase vouchers have special inventory considerations for accounts-with inventory companies.
Sales and Purchase ledger accounts must have the option Are Inventory Values Affected set to Yes for this section. Unless this option is set to Yes in the Ledger creation screen, it is not possible to make a Sales entry or a Purchase details.
Similarly, sales and Purchase accounts affect inventory. Hence, when you enter a Sales or a Purchase Voucher, an Inventory Allocations for sub-screen pops up as soon as you enter the ledger requiring you to give inventory item details.
The inventory details that you mention in an accounting voucher (like Sales and Purchase Voucher), affects stocks by immediately updating them, only if Tracking Numbers are not activated in [F11]: Features.
The information that you need to give in the inventory allocation sub-screen depends upon the features enables for the company.
UNCONVENTIONAL VOUCHERS
Unconventional Vouchers are the special vouchers that are used to record provisional or non-accounting transactions. Use unconventional vouchers to remove unnecessary entries from the main books of accounts and make information available. These vouchers enable valuable reports in terms of provisional accounts and forecasting.
MEMO VOUCEHR
This is a non-accounting voucher and the entries made using memo voucher will not affect your accounts. In other words, Tally does not post these entries to ledgers but stores them in a separate Memorandum Register.
Uses of Memo Vouchers
Making suspense payments
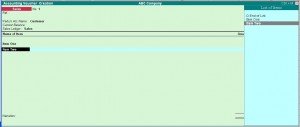
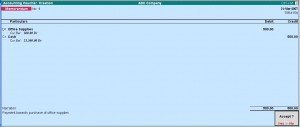
Consider a company gives its employee cash to buy office supplies, the exact nature and cost of which are unknown. For this transaction you can enter a voucher for the petty cash advance, a voucher to record the actual expenditure details when they are known, and another voucher to record the return of surplus cash.
However, a simpler way of doing it is to enter a Memo voucher when the cash is advanced, and then turn it into a Payment voucher for the actual amount spent, when the details are known.
Consider the following Example.
The Company pays its employed Rs. 500 as petty cash advance for Office Expenses.
The following entry has to be passed.
- Enter Date
Vouchers not verified at the time of entry
If you do not understand the details of a voucher you are entering, you can enter it as a Memo voucher and amend it later when the details are available.
Items given on approval
Generally completed sales are entered into books. Items are given on approval, use a Memo voucher to track and convert it into a proper Sales voucher. You can delete the memo voucher if the sale is not made.
MEMORANDUM VOUCHER REGISTER
To view all the memorandum vouchers:
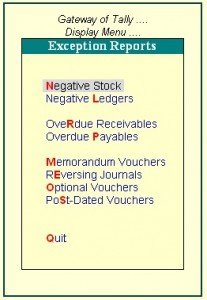
Go to Gateway to Tally > Display> Exception Reports > Memorandum Vouchers.
Note: You can also view memorandum vouchers from the Day Book.
You can alter and convert a Memo voucher into a regular voucher when you decide to consider the entry into your books. Use Scenarios to see the effect of Memo entries on reports and statements.
OPTIONAL VOUCHER
This is also a non-accounting voucher. Unlike a Memo voucher, this is not a separate voucher type. You can mark an existing voucher (for example, a payment voucher or a receipt voucher) as Optional. Press CTRL + L or click on Optional from the Button Bar. This button toggles with Regular. By marking a voucher Optional, the voucher does not get posted anywhere but remains in the Optional Register
You can make a voucher type default to Optional if you need to create a new voucher type or alter an existing voucher type.
Go to Gateway of Tally> Accounts Info > Voucher Types> select a Voucher Type> Set Make Optional as default to Yes.
Enabling Optional Vouchers
- Go to Gateway of Tally
- Select F11: Features> Accounting Features to display Company Operations Alteration screen
- Set Use Rev. Journals & Optional Vouchers? to Yes.
- Accept the screen to save.
Use of Optional Vouchers
- If you do not want a transaction that is incomplete t affect the accounts, you can mark this as an Optional Voucher. Once the transaction is complete, modify the voucher and post it as Regular Voucher. For example, Performs sales invoice. In fact, an optional sales invoice prints as a Performa Invoice.
- Optional Vouchers allow you to see the impact of transactions without actually posting them.
- Optional Vouchers can be used to forecast future sales. For example, create a New Voucher Type – Sales Forecast. Record future sales projections using this voucher type
Let us consider the following example.
On 30th June you want to view the Balance Sheet as of today but June rent is not due for payment until the first week of July. This liability is not reflected in the Balance Sheet. To overcome this, enter an Optional Voucher dated 30th June. The above entry is made as shown below
- Enter Date
- Select Optional from the button bar
When you view the Balance Sheet, generate a report with the Optional Voucher included. The Optional Voucher should be already defined as a Scenario. The voucher affects the report temporarily. Once you quit the report, Tally does not retain the Scenario details. The next time you view the balance sheet, it will not include the effect of the Optional Voucher unless you include it.
Note: Use Scenarios to see the effect of Optional voucher entries on reports and statements.
OPTIONAL VOUCERS REGISTER
You can view all optional vouchers in the Optional Voucher Register
Go to Gateway of Tally> Display> Exception Reports> Optional Vouchers
Note: You can view them from the Day Book as well.
REVERSING JOURNALS
Reversing Journals are special journals that are automatically reversed after a specified date. They exist only till that date and are effective only when they are included in reports like the Balance Sheet. These are used in interim reporting in the course f the financial year where accruals are to be reported. These accruals are usually short term and are cleared in the subsequent period. However, to get a proper perspective, decision makes require the reports with full impact of all aspects and transaction.
Activating Reversing Journals
To activating Reversing Journals
- Go to Gateway of Tally
- Select F11: Features> Accounting Features to display Company Operations Alteration screen.
- Set Yes in Use Rev. Journals & Optional Vouchers?
- Accept the screen to save.
An example is – the provision for depreciation. Depreciation is usually provided for at the end of the year. However, including it for monthly reporting would give a more accurate status.
Let us take another example:
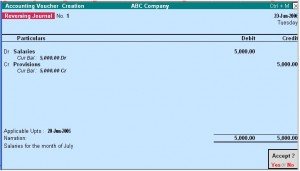
On 30th June you want to view the Balance Sheet as of today but June salaries are not paid until the first week of July. There is, therefore, a large liability, which would not be reflected in the Balance Sheet. To overcome this you enter a Reversing Journal Voucher dated 30th June, which would look like this:
When you view the Balance Sheet, Tally displays the report with the reversing journals included. The voucher affects the report only for that day, 30th June.
Application up to
This is the date up to which the Reversing Journal is available for inclusion in a scenario report. The Revering Journal can be created as of a particular date and made Applicable up to a different date. For example the depreciation entry could be dated October 1, 2005 and applicable up to October 31, 2005. The journal will be available for inclusion in a scenario for any day from October 1, 2000 till October 31, 2000. It will not exist before 1st Oct and will be reversed automatically after 31st Oct and consequently unavailable.
REVERSING JOURNAL REGISTER
All vouchers are maintained in a Reversing Journal Register. These are no posted to any books of accounts and cannot be included in regular report. They can only be seen through a scenario.
Go to Gateway of Tally> Display> Exception Reports> Reversing Journals
POST-DATED VOUCHERS
While entering vouchers, you can mark them as post dated. Tally will not update the vouchers in ledgers until the specified date is approached. This is useful to enter transactions that take place on a regular basis. For example, if you pay for something by installments, you can set up the payments in advance, and Tally will only enter them in the ledgers as they fall due.
Mark vouchers Post Dated by using CTRL+T or click on Post dated button from the Button Bar. This button toggles with Current.
Post-dated Vouchers Register
All Post-dated vouchers are maintained in a Post-dated voucher Register.
Go to Gateway of Tally> Display> Exception Reports> Post-Dated Vouchers.
Difference in the treatment of Post-dated Vouchers and other Unconventional vouchers
The major difference between post dated vouchers and other Unconventional vouchers is that post dated Vouchers affect regular books of accounts on the date of the voucher. Post-dated vouchers are not available for selection in Scenarios.
CREATING ACCOUNTING VOUCHERS IN TALLY
To view the Accounting Vouchers screen:
Go to Gateway of Tally> Accounting Vouchers
Note: The Voucher Entry screen display depends on the Voucher Configuration. To go to the next voucher screen you can simply switch the vouchers using the buttons from the Button Bar or by using the Function keys.
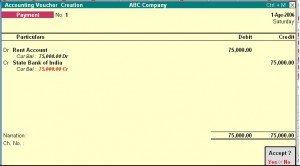
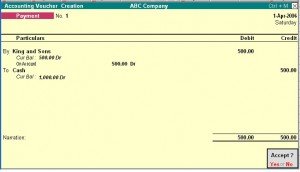
Consider a simple payment voucher screen.
Type of Voucher
You need to check whether you are using the right voucher for the transaction. You change the voucher type by selecting the new type from the Button Bar.
In some cases, Sales, Punchers and Journal, as well as where you have created your own voucher types. For example, under Payment, Tally will display a List of Vouchers for the type you select, from which you make a further choice.
Voucher Number
If you have set Method of Voucher Numbering to Automatic in Voucher Type screen, Tally will automatically enter the voucher number enter the voucher number and if you have set Method of Voucher Numbering to Manual, Tally allows you to enter the voucher number manually.
Reference
You can enter a reference such as Purchase Order Number or Invoice Number in the Ref: Field.
Note: Reference is not available for receipt and payment vouchers.
Date of Voucher
The date of the voucher you enter is displayed at the top-right of the Voucher Creation screen. The date is taken initially from the Current Date in the Gateway of Tally. However, you can change the date to ensure vouchers are entered with the appropriate date using the F2: Date button.
Note: You change the date using the F2: Date button from the button bar.
NARRATIONS
You can type any comment that is appropriate for the transaction in Narrations. You can configure Tally’s Narration details as per the type of narration for the transaction. The types of Narrations are:
- Common Narration – Common narration details for the entire Voucher at the end.
- Single Narration – Narration details for every debit or credit transactions made.
Enabling Narrations
Common Narration is enabled by default in Tally.
To activate Narrations on the voucher screen
- Go to Gateway of Tally> Accounts Information> Voucher Type> Alter
- Select the required Voucher
- set the option Narrations for each Entry to Yes
- Accept the details.
- Return to Accounting Vouchers on Gateway of Tally and make a payment voucher entry as required.
Following examples demonstrate a Payment transition that has both common narration and narrations for each entry. The advantage of this being that you cha give single line narration separately for every ledger account selected in case of multiple debit/credit entries.
PARITCULRS TO/BY OR DR/CR
To/By or Dr/Cr
By default Tally displays To/By which can be changed to Dr/Cr.
- Set Use Cr/Dr instead of To/By which can be changed to Dr/Cr.
- Accept to Save
Each voucher line displays a prompt of Dr/By for debit entries or Cr/To for credits.
Note: Depending on the voucher type, Tally selects either Dr or Cr/ To or By. Thereafter, you can change the prompt (if required) by typing over it with a D or C / T or B.
PARTCULARS – LEDGER NAME AND AMOUNT
Ledger name and amount
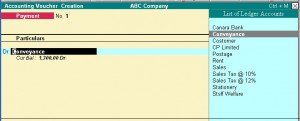
After To/By or Dr/Cr, you enter the ledger names that are already created and the debit and credit amounts. To select a ledger, type the first letter of its name and Tally displays a List of Ledger Accounts. The ledgers starting with the typed letter are highlights. Only ledgers suitable for the voucher type are displayed. As you continue typing, the highlights reduce until a match is found.
The first ledger name prompt depends upon the voucher type.
For example, in a Payment Voucher you have to first debit a personal account like a creditor or a nominal account like Rent. Hence you are not allowed to enter Cash or Bank as that would determine money received.
Note: In special case where in you have activated the option Allow Payment/Receipt as Control in the Voucher Configuration you are permitted to do so.
Likewise, in a Sales Voucher, you must first debit a personal account name like a customer and not a nominal account name.
When you select the ledger, the current balance is displayed (only if F12: Configure is configured). When you enter the amount, the revised current balance is shown. After selecting the next ledger, Tally suggests the balancing amount as the value to enter, which may be accepted or typed over. You cannot complete the voucher entry until the debit is equal to the credit.
VOUCHER CLASSES
Voucher Class is a method of automating accounting allocations during Invoice entry. It is a table for predefining the entries to make invoice entry a simple task. This is particularly useful in sales invoicing where the nominal ledger accounts, to be credited for each item of sale is defined once. During voucher entry, the accounting credits for items sold are done automatically. Additional accounting entries like Tax, Freight and other charges can also be predefined to be brought up during actual invoicing.
This will have restriction on a data entry operator to alter or modify the vouchers. the total control tests with senior management to set the class parameters. It also reduces chances of errors during voucher entry. You can still continue to use Tally as before without classes if you do not require it.
Classes can also be used to automate the rounding off the values. The rounding – off method can be preset when defining a class for a line or for the entire voucher or invoice.
Voucher Class Permits:
- Automation of entries to predefined ledger accounts.
- Automatic rounding off to preset value limits.
INVENTORY VOUCHERS
INVENTORU Vouchers perform the same function in the inventory system just as accounting vouchers do in the accounting system. Inventory Vouchers are also means of entering transaction. Inventory vouchers record the receipt and issue of goods/stock, the transfer of stock between locations and physical stock adjustments.
If you have not integrated accounts with inventory, inventory vouchers will not have any impact on the Balance Sheet stock figures. They will maintain the stock balances separately.
To view Inventory Vouchers:
Go to Gateway of Tally > Inventory Vouchers
Configuration on Tally
Set the option Integrate Accounts and Inventory to Yes in F11: Features.
You can trace an entire transaction from the beginning i.e., goods transfer stage to the financial accounting irrespective of integration status.
For example, the purchase of stock can be tracked from the purchase voucher through the receipt note, through invoice from the supplier and also through eventual payment.
TYPES OF INVENTORY VOUCHERS
Tally is pre-programmed with Inventory Vouchers of Various natures, each designed to perform a different task. The following table displays the standard Accounting Vouchers provided in Tally and their corresponding activation key combination and buttons. You can either use the key combination given in the table below or the buttons on the Button Bar.
| Key Combination | Buttons | Voucher Type |
| ALT+F9 | F9: Rcpt Note | Receipt Note Voucher |
| ALT+F8 | F8: Dely Note | Delivery Note |
| ALT+F6 | F6: Rej.Out | Rejections Out |
| CTRL+F6 | F6: Rej.In | Rejections In |
| ALT+F7 | F7: Stk Jrnl | Stock Journal Voucher |
| ALT+10 | F10: Phys Stk | Physical Stock |
| ALT+F5 | F5: Sales Order | Sales Order |
| ALT+F4 | F4: Purc. Order | Purchase Order |
Set the option Use Tracking Numbers to Yes in F11: Company Features to activate Goods In Receipt Note and Goods Out Delivery Note vouchers. Tally will assume that goods are received along with Purchase Vouchers and Goods are delivered along with Sales Vouchers/Invoices. Activating Tracking Numbers denote that you may receive goods that are not accompanied by a Supplier’s invoice, i.e. the invoice will arrive separately and that you may not deliver the goods along with the invoice but will invoice it later.
Note: In a voucher you are allowed to select Not Applicable when the Tracking Number sub-screen appears. This would update inventory immediately between delivery notes for stock delivered from different locations you can create vouchers to do this.
RECEIPT NOTE VOUCEHR
This voucher type is used for recording goods received.
To view the Receipt Note Voucher:
- Go to Gateway of Tally > Inventory Vouchers
- Press the button Alt+F9 or Select the button F9: Rcpt Note from the button bar.
For example, consider the company receives new stock items from a supplier. If a Purchase Order exists for that Supplier, select the Order Number from the List of Orders pop up menu to bring up the order particulars automatically.
| Receipt Note | |
| Description | |
Records receipt of new stock from suppliers
Details Recorded
Reference, Ledger Account, Supplier’s Name, Address and Dispatch Details (If Accept supplementary Details option is set to Yes in F12: configure), Name of Stock Item, Tracking Details, Godown, Quantity, Rate (Optional), Amount (Optional), Narration.
REJECTIONS-IN VOUCHER (SALES RETURNS)
A Rejections In Voucher is used to record goods that are rejected and returned back by the customer:
To view the Rejections In Voucher
- Go to Gateway of Tally > Inventory Vouchers
- Press the Ctrl + F6
| Rejections In Voucher | |
| Description | |
Records receipt of goods from customers.
Details Recorded
Ledger Account, Customer’s Name, Address (If Accept supplementary Details option is set to Yes in F12: configure), Name of Stock Item, Tracking Details, Order details, Godown, batch details, Quantity, Rate (Optional), Amount (Optional), Narration.
DELIVERY NOTE VOUCHER
The delivery Note Voucher is used for recording goods delivered to a customer.
To view the Delivery Note Voucher
- Go to Gateway of Tally > Inventory Vouchers
- Press the Alt + F8 or select the button F8: Dely Note from the button bar.
For Example, the company delivers goods from Stock to a customer. If a Sales Order exists for that customer, selecting the appropriate Order Number from the List of Orders pop-up menu will automatically bring up the relevant particulars
.
| Delivery Note | |
| Description | |
Records the delivery of goods to customersDetails Recorded
Reference, Ledger Account, Customer’s Name, Address and Despatch Details (If Accept supplementary Details option is set to Yes in F12: configure), Name of Stock Item, Tracking Details, Godown, Quantity, Rate (Optional), Amount (Optional), Narration.
REJECTIONS-IN VOUCHER (PURCHASE RETURNS)
The Rejections out Voucher record goods that are rejected and returned to supplier.
To view the Rejections out Voucher
- Go to Gateway of Tally > Inventory Vouchers
- Press the Ctrl + F6 or Select the button F6: Raj. Out from the Button Bar
For example, the company returns items that had previously been taken into stock from the supplier.
| Rejections Out Voucher | |
| Description | |
Records return of goods to suppliers
Details Recorded
Ledger Account, Supplier’s Name, Address and Dispatch Details (If Accept supplementary Details option is set to Yes in F12: configure), Name of Stock Item, Tracking Details, Godown, Quantity, Rate (Optional), Amount (Optional), Narration
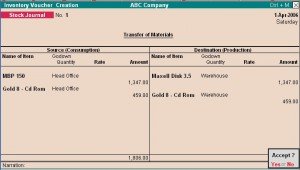
STOCK JOURNAL VOUCHER
Stock Journal Voucher is used to record stock transfers from one location to another.
To view the Stock Journal Voucher:
- Go to Gateway of Tally > Inventory Vouchers
- Press the buttons Alt + F7 or Select the button F7: Stk Jrnl from the Button Bar
For example, the company transfers items of stock from the warehouse to the shop.
| Stock Journal Voucher |
Description
Records the transfer of stock from one Location to another
Details RecordedReference, Name of Source and Destination Locations, Name of Stock Item, Godown. Batch, Quantity, Rate, Amount, Narration
PHTSICAL STOCK VOUCHER
Physical Stock Voucher is used for recording actual stock physically verified or counted.
To view the Physical Stock Voucher
- Go to Gateway of Tally > Inventory Vouchers
- Select the button F10: Phys Stk form Button Bar or Press Alt + F10
For example, Physical Stock is the stock found on conducting a stock check. It is not unusual that the company finds a discrepancy between actual stock and computer stock figure. Physical vouchers will be useful for recording purposes only if you have configured inventory vouchers to ignore physical stock differences. If you have configured the vouchers so that physical stock difference is not ignored, than all transactions subsequent to the physical stock voucher will use the balance as mentioned in that voucher.
| Physical Stock Voucher |
Description
Records the physical stock count as the new stock balance
Details Recorded Stock Item, Locations, Batch details and Quantity.
ENTERING PURE INVENTORY VOUCEHRS IN TALLY
Selecting and Entering the Voucher
There are five kinds on inventory vouchers:
- Receipt Notes and Delivery Notes
- Reception – in and Rejections – Out
- Sales Order and Purchase Order
- Stock journal
- Physical stock
Note: Vouchers involving pop-up screens depend upon configuration settings and it will be assumed that these settings have been activated.
The basic procedure to enter voucher is:
- Go to Gateway of Tally > Inventory Vouchers
- Change the date if necessary.
- Select the Voucher type form the Button Bar
ENABLEING F11: FEATURES
- Set Use Tracking Numbers to Yes to activate Delivery Note and Receipt Note vouchers.
- Set Use Rejection Notes to Yes to activate Rejections In and Rejections Out vouchers.
- Set Allow Purchase Order Processing and Allow Sales Order Processing to yes to activate Purchase Order and Sales Order vouchers.
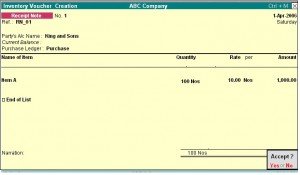
A typical Receipt Note inventory voucher screen appears as shown below:
The screen is divided into three sections:
- The Type, Reference and Date of the Voucher.
- Party’s Particulars and Ledger Account.
- Inventory Item Details.
You can change the voucher type by selecting the required type from the Button Bar.
Note: In some cases such as Receipt Notes (where you have opted for Use rejection notes in F11) you will see a pop-up screen from which you select the right voucher.
Type of Voucher
Select the Voucher required form the Button bar.
Prior to making a voucher entry, ensure that you are using the right voucher. You can change the voucher type by selecting the new type from the Button Bar. In some cases, like receipt notes (where you have opted for Use Rejection notes in F11: Features) you will see a pop-up screen fro, which you can select the appropriate voucher.
Voucher number
Voucher numbering by default is automatic. It can be entered manually by setting it in Voucher Types.
Reference number
This is optional. You can enter a reference such as Purchase Order Number or Supplier’s Delivery Note Number.
Date of voucher
The date of the voucher you are entering is displayed at the top-right of the Voucher Creation screen. By default, this will be the Current Date. You can change the date to the transaction date.
Note: you can change the date using the F2: Date button on the Button Bar.
Ledger Account
There are no To/By or Dr/Cr in inventory vouchers.
To select a ledger, type the first letter of its name and Tally will display a List of Ledger Accounts. As you continue typing. The highlights reduce until a match is found. Here you usually need a supplier’s ledger account.
Supplier’s name and address
Enter details of the supplier’s name and address. This can be different from the ledger name or can be the same. This information is useful when printing out the Goods Receipt Note.
Name of the Item
From the pop-up list of Stock Item, select the Stock Item that is being received. If it is not in the list, create it using ALT+C.
Tracking Number
Set Use Tracking Numbers to Yes in F11: Features> Inventory Features
The Tracking number is used to link the Receipt Note with the Supplier’s Invoice that will be received later. (Supplier’s Invoice is recorded through the Purchase Voucher). Hence, select the number which helps maintain the link. Tally gives the Receipt note number and the Reference number as default. However’ you may opt to give your own number, in which case select NEW Number. if you not wish to give a tracking number at all select Note Applicable.
Tracking numbers link the different accounting vouchers with the inventory vouchers as follows:
- Receipt Note/Goods In vouchers are linked to Purchase Vouchers
- Goods Out/Delivery Note are linked to Sales Voucher/Invoice.
- Rejections-In is linked to Credit Note
- Rejections-Out is linked to Debit Note
New Number
Enter a new number that is not in the list. You can use this number to reconcile, while making a Purchase Voucher entry.
Not Applicable
You can select Not applicable if you do not want tracking number. this may be resorted in cases where you want to update stocks immediately with this entry and no goods inward entry is needed.
If you select Not Applicable in an inventory voucher it will update stocks and you need not make a separate accounting/invoice entry.
Uses of the option Not Applicable
- If you need to raise a sales voucher/invoice that accompanies the goods and do not want to pas Goods Out entry, Not Applicable will update stocks without the Goods Out entry.
- When you record a purchase voucher and wish to update inventory without a separate Goods In entry, select Not Applicable for the tracking number.
- The same applies to Debit Notes-Rejection Out and Credit Note-Rejection In.
- When you send out samples for approval, where you do not want to raise an invoice.
- When you receive samples, but no invoice will be forthcoming.
CREATING A STOCK JOURNAL
A Stock Journal is used to transfer materials or stock from one location to another location. Stocks can also be shown as consumed. It can only be produced without consumption and production. Hence, it is not like other journals where debits and credits match.
You can specify quantities that are moved, their rates and amounts. If standard rates are entered in the Stock Item masters, they will appear. In the target location, you can specify additional costs incurred without actually affecting accounting at all. Only the stock value goes up. Hence, it is technically correct where an expense incurred on production or inward has been accounting for in th cost of that item.
To create a Stock Journal Voucher
- Go to Gateway of Tally > Inventory Vouchers
The Stock Journal Screen has three parts-
- The part at the top accepts general information.
- The left-hand side accepts the Source Godown or Consumption Part.
- The right-hand side accepts the Destination Godown or the Production Part.
You must furnish the common information required in the field that appears at the top. You may elect to give information for only the left or the right part or both.
COMMON INFORMATION
Reference, date and voucher number
Reference field will be displayed if this is option is activated for the voucher. Give a reference number, if required. Voucher number depends upon the settings in Voucher Type.
Source (consumption)
Select the name of the Stock Item and the Godown from which it moves or where it is consumed as well as the Quantity, rate and amount. If the rate is specified in the Stock Item master it will be displayed when you indicate the Item name.
Note: the effect of entry in this part is to reduce stock of the Items specified.
Destination (Production)
Mention the name of the item and the Godown to which the item is moved. If is not necessary that the item names should match the names in the source part. This is because a totally new Item could be produced out of the materials consumed. You can specify the rate of the Item, Quantity and amount. If the rate is specified in the Stock Item master, it will be brought up when you indicate the Item name.
Note: The effect of entry in the Destination Part is of increasing the stock of the Items specified in this part.
Additional cost details
This is another interesting facility is available for the Destination Godown (Production). You can specify what additional costs were incurrent in moving goods to the Godown or for producing them. Thought these costs are strictly accounting heads, they do not get posted in the relevant nominal ledger accounts but add to the cost of the Item. In the target Godown, you can specify additional costs incurred without actually affecting accounting. Only the stock value goes up. Hence, it is technically correct where and expense incurred on production or inward has been accounted for in the cost of that item.
After entering the amount for and Item, the following Additional Cost Details entry box pops up.
You may specify additional costs for transferring or producing the item. The typically additional costs are wages, power, and freight and so on. Ensure that you have ledger accounts opened for the additional cost. Moreover, additional costs entered for the ledgers, do not reflect in the relevant ledger with the amount but only add to cost of the item.
Percentage (%-age)
You can specify the additional cost in percentage of the cost of the item, in which case enter the number, for example, 2 for 2% of the cost of the item. You may, alternatively, skip the percentage field and input an amount directly.
Actuals
This displays the total additional cost for the item and the effective cost per unit of item/product produced.
HILL OF MATERIALS
A Bill of Materials is a list of constituent items along with quantity details that can be allotted towards manufacturing a certain product, by-product or likewise. This facilitates immediate reduction in stock of the item automatically. This process of listing the items that make up another item is made possible in Tally by enabling the Bill of Materials Facility.
Enabling Bill of Materials
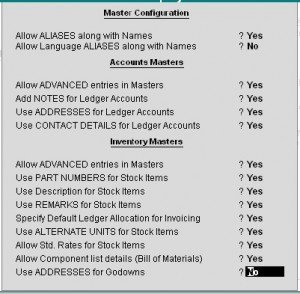
This is useful for manufacturing organizations and can be set up through F12: Configure. The Bill of Materials option now appears in the Stock Item Creation screen only after entering a unit of measure in Units field.
- Go to Gateway of Tally > F12: Configure
- Select Accts/Inv Info from the Configuration Menu
A Bill of Material should be available while manufacturing an item. This is done through a stock journal. It is advisable to create a new voucher type, say, Mfg Journal which is based on Stock Journal
Stock Journal as Manufacturing Journal
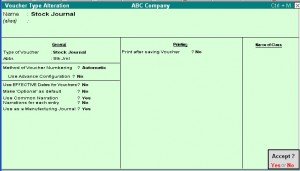
Stock Journal vouchers have an options Use as a Manufacturing Journal, in the Voucher Type Creation screen which has to be set to Yes.
- Go to Gateway of Tally
- Select Accounts Info. > Voucher Types > Alter
- Select the Stock Journal Voucher from the Voucher Types
When you use a Stock Journal as a Manufacturing Journal, the Stock Journal voucher entry screen will be modified to accept Name and Quantity of the product being manufactured, its list of components and additional costs of manufacture associated with it. for and end-product item, if you have specified a bill of material that contains the list of components, this list will be brought up automatically and filled in for the quantity of the end product
CREATING A BILL OF MATERIAL
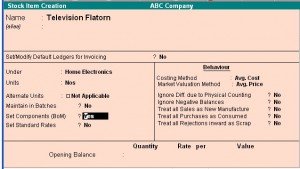
Bill of Material (BoM) is created only for those4 items that are being assembled in-house. For trading items, you do not need a BoM. Therefore, you need to specify a BoM at the time of creating a Stock Item or when altering its master.
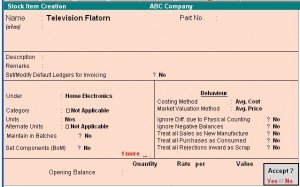
Let us create a new Stock Item Television Flatiron and specify its BoM.
Go to Gateway of Tally> Inventory Info. > Stock Items > Create
The Stock Item Creation screen is displayed below.
Some information like Batches, Alt. units etc. depend upon the company features, configuration and invoicing set-up. For details on fields other than Set Components (BoM) refer to the Stock Item Creation section under Inventory Information.
The different for India/SAARC would be in the field Rate of VAT and MRP/Marginal.
- Set the option Allow Component list details (Bill of Materials) to Yes in F12: Configure.
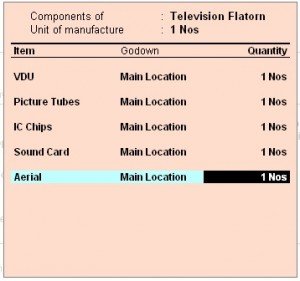
Unit of Manufacture
Specify the appropriate number of the finished product items hat will be made. While manufacturing and recording through stock/manufacturing journal, record the item in multiples of this unit of manufacture. The components are multiplied by the same factor automatically. You are allowed to alter the components to reflect actual consumption, if there is a change from BoM.
Note: Under certain circumstances, it is better to give a larger unit of manufacture, for example, per 1000 Pcs of nails, as raw material consumed for 1 piece of nail is in significant.
Item, Godown (Location) and Quantity
Enter the component name and quantity. If there are multiples Godowns or Locations, specify the storage location for the item.
Enter the options for all appropriate fields for the stock item and accept the screen.
MANUFACTURING JOURNAL ENTEY
- Go to Gateway of Tally > Inventory Vouchers
- Select the button F7: Stk. Jrnl or press Alt +F7
If you are creating a new voucher type Manufacturing Journal, a pop-up menu is displayed with the options default Stock Journal and Manufacturing Journal.
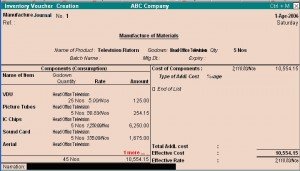
Select Manufacturing Journal and the following; screen will be displayed.
INPUT FIELDS
Reference Number
Enter a reference number, if required.
Name of Product
Enter the name of the Stock Item to be manufactured.
Location
Enter the location where the Item is manufactured. This location will show the stock.
Quantity
Enter the quantity of the item to be manufactured.
Component (Consumption)
The component list for manufacturing the product and the proportionate quantity of each component (based on the quantity specified for the product in BOM) is produced. For each component, the default location is given as specified in the BoM. The entire component list can be altered, components added or removed and locations amended.
Note: Any change made during this entry will not affect the original Bill of Material for this product. If you want to make permanent change to the Bill of Material, alter the Stock Item master information of the product.
Cost of components
The base cost of the components are automatically added and displayed on the screen.
Additional cost components
Specify additional costs for producing an item. These are typically wages, power, and freight. Creating ledger accounts for the additional costs is a must. Moreover, additional costs entered for the ledgers are not reflected in the relevant ledger with the amount, but these additional costs only add to the cost of the item.
% age
Additional costs can be entered in terms of percentage of cost of components. For example, 2 for 2% of the cost of components. You can also skip the percentage field and enter an amount directly.
Total additional cost
This field displays the total additional cost for an Item.
Effective cost
This is the sum of the total cost of components and additional costs.
Effective rate
Effective cost per unit of item/product produced.
PURCHASE AND SALES ORDERS
Order Processing
Order processing is the placing of orders with suppliers for purchase to be made from the or receive orders from customers for the purpose of selling. In Tally, Order Processing is linked to Inventories. This allows tracking of the order position for a Stock Item. Using this you can track arrival of goods ordered and also whether the ordered Stock Item are delivered on time etc.
You can create Purchase and Sales Orders in Tally. Purchase Orders (PO) can be created, printer and sent to suppliers. Goods received are linked with the POs and Invoices. Outstanding Purchase Orders should be monitored. Stock Summary displays order position of any item. The Purchase Order Book lists out all the Purchase Orders Placed.
Likewise, Sales Orders received are recorded in Sales Order Entry screen. These details will be available during Delivery Note and Invoicing. The order position in the Stock Summary can be viewed. The Sales Order Book lists all Sales Order received.
Enabling Purchase and Sales Orders
To enable Sales Order and Purchase Order vouchers, activate the following in F11: Features.
- Set Allow Purchase Order Processing and Allow Sales Order Processing to Yes.
CREATING A PURCHASE ORDER
Purchase Order details depend on configuration settings.
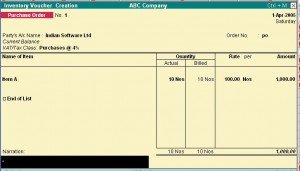
To create a Purchase Order:
Go to Gateway of Tally > Inventory Vouchers> F4: Purc. Order
Party’s A/c Name
Select the Supplier’s name form the List of Ledger Accounts. Use Alt + C to create a new account.
Order No
Enter the purchase order number. Configure the voucher type through Accounts Info > Voucher Types to set prefixes and suffixes for Purchase Orders. This particular Order No. field is an additional field to record order number if it is different from the voucher number. The voucher number is automatically displayed here; it is also possible to change this number if needed.
Name of the Item
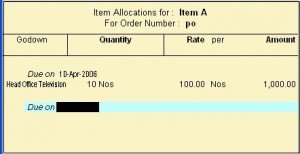
Select the Stock Item that needs to be purchased from the List of Stock Items. The Item Allocations sub-screen is displayed. Enter the details as show below.
Due on
Enter the due date for delivery to the item. This monitors outstanding deliveries. The order can be split for delivery on different dates. If the order is split, give the due date of the first lot to be delivered. After selecting the respective Godown and entering the Quantity, Rate and Amount, specify the due date for the second lot. If the whole lot is delivered at a time, Press Enter in the Due on field to return to the Voucher Creation screen.
The cursor the returns to the Item field once again. Now enter another item. If no other item is required, press Enter in the blank field to navigate to the next field. Press the space bar to display the List of Ledger Accounts.
You can also specify other expenses like freight, tax to be charged if any in the Purchase Order. The Tax and Expense has to exist as a ledger account or it may be created using Alt + C.
Location
This field should be entered with required details if multiple-location feature is enabled, otherwise it does not appear.
Quantity, Rate and Amount
Enter the quantity of the item required and its rate. The amount is calculated, but it can be modified to enable rounding off.
Additional Cost Details
Enter any additional cost incurred on the item here. This can be either entered as a percentage of th item cost or a fixed amount. If not, select End of List. Additional costs increase the value of the item, but they do not appear independently in the nominal ledger account or expense.
Next Item
The cursor comes to the Item field once again and you can enter another item to order. If no other item is required, press enter on the blank field to take the cursor to the tax/expense field.
Expense/Tax
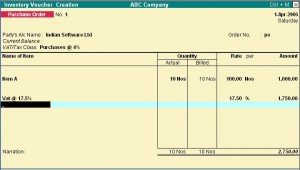
Once the item details have been entered, specify tax to be charged and other expenses like freight, if any. The tax or expense has to exist as a ledger account if they do not exist, create it using Alt + C. Here, consider tax @ 17.5% that is charged on the item values.
The order entry screen appears as shown below.
Narration
ALTERING A PURCHASE ORDER
To alter a Purchase Order
- Go to Gateway of Tally > Display > Day Book
OR
- Go to Gateway of Tally > Display > Inventory Books > Purchase Order Book Make the necessary alterations and save.
DELETE A PURCHASE ORDER
To delete a Purchase Order Press Alt + D in the Purchase Order alteration screen
This filed is optional. Enter necessary particulars about the order.
CREATING SALES ORDERS
Sales order entry is exactly like the Purchase Order Entry. Sales Order details will also depend on configuration settings.
To create a Sales Order:
Go to Gateway of Tally > Inventory Voucher> F5: Sales Order
Party’s A/c Name
Select the Customer’s name. press Alt + C to create a new account.
Order No
The voucher number is automatically displayed. You can change this number if required. Enter the sales order number.
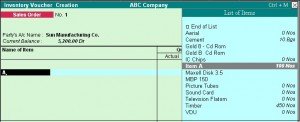
Name of the Item
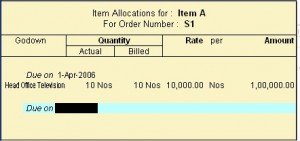
Select the Item for which th order is to be placed from the List of Stock Items. Here, the Item Allocations sub-screen is displayed.
Enter the details as shown below:
Due on
Enter the due date for delivery to the item. This monitors outstanding deliveries. The order can be split for delivery on different dates. If the order is split, give the due date of the first lot to be delivered. After selecting the respective Godown and entering the Quantity, Rate and Amount, specify the due date for the second lot. If the whole lot is delivered at a time, Press Enter in the Due on field to return to the Voucher Creation screen.
The cursor the returns to the Item field once again. Now enter another item. If no other item is required, press Enter in the blank field to navigate to the next field. Press the space bar to display the List of Ledger Accounts.
You can also specify other expenses like freight, tax to be charged if any in the Purchase Order. The Tax and Expense has to exist as a ledger account or it may be created using Alt + C.
Location
In case multiple location features are active this field has to be mentioned. Otherwise it does not appear.
Quantity, Rate and Amount
Enter the quantity of the item required and its rate. The amount is calculated, but it can be modified to round it off.
Additional Cost Details
There are no additional cost details for sales orders. They exist only for Purchases as the values are added to the cost price. In case of sales, additional cost needs to be entered below the line along with tax.
Next Item
After completion of entering the first item, the cursor comes to Item field once aging and you can enter another item to order. If there is no other item, press Enter in the blank field to take the cursor to the tax/expense field.
Expense/Tax
Once the item details have been entered, specify tax to be charged and other expenses like freight, if any. The tax or expense has to exist as a ledger account if they do not exist, create it using Alt + C. Here, consider tax @ 17.5% that is charged on the item values.
The Sales order entry screen appears as shown below.
Narration
This field is optional. You can give some particulars about the order.
INVOICE ENTRY
Invoicing or sales invoicing is almost similar to sales voucher entry. You will use the same voucher but select As Invoice option to turn it into a sales invoice. Purchase invoices are recorded through normal Purchase Voucher entry and it does not have the provision of being converted into an invoice format for entry purposes, similarly, you can print the Purchase voucher as a Purchase Invoice or even a Purchase Order.
The advantage of using the invoice format for sales and purchase voucher entry is that is enables automatic calculations of taxes and duties. This is possible for only those groups for which used for Calculation is enabled under the group Duties and Taxes. This is also possible for other groups for which the field Used for Calculation is enabled in the Group Creation screen.
In recording both sales and purchase invoice details, you can adjust accounting and inventory balances and account for Taxes simultaneously.
The default invoice formats has various configuration options. Use them to print your invoices as per requirements. It is not necessary to create new invoice formats. It is recommended that you configure the default invoice as per requirements. You can also design a new invoice using Tally’s Definition Language (TDL) Report Designer. TDL is quite and advanced language with which you can create new reports and screens. You can even modify existing reports and screens.
Settings for creating Sales and Purchase Invoice
- Ensure that Allow Invoicing is set to Yes in F11: Features to create sales invoice. This brings up another option. Set Separate Discount Column invoices to Yes if you want a separate column for discounts in invoices.
- To create purchase invoices, ensure that Allow Invoices is set to Yes and also Enter Purchases in Invoice Format is set to Yes in F11: Features. If you want a separate column for discounts in invoices, follow the procedure described above.
- Go to Gateway of Tally > Accounting Vouchers. Select either sales or purchase voucher. If you set Show Inventory Details to Yes in F12: Configure, all inventory details will be displayed on voucher screen.
- While creating Ledgers under the group Sales and Purchase Accounts, ensure that the option Inventory values are affected is set to Yes.
- If you want tax accounts (under the group Duties & Taxes) to use automatic calculation, ensure that the Percentage of Calculation is entered (For example, 17.5) and the appropriate Method of Calculation is selected from the pop-up menu in the Ledger Creation screen. If it is to use Tax based on Item Rate, then the Stock Item must have the rate specified. For more details refer Ledgers.
PRINTING INVOICES AND VOUCHERS
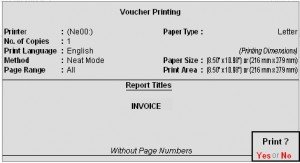
To print any voucher or invoice, press ALT+P or click on the button Print. You can configure the voucher type to print automatically after saving the voucher.
Note: You can configure the printing options be selecting the appropriate buttons. You can give additional information. Change titles. Print additional pages, change printer settings.
The buttons Pre-Printer and Quick Format toggles for Plain Paper and Neat Format respectively. These are print specifications that you set. Pre-printed is for per- printed stationery. Quick Format does not give fonts or other niceties but is ideal for fast printing. Select copies and give the number of copies to be printed. By default this is set to one copy. You can set the number of copies in Invoice Printing Configuration.
Go to Gateway of Tally> F12: Configure> Printing
View invoice as voucher and vice-versa
Once you create the invoice, you can view it as a voucher by simply displaying it and clicking on the toggle button [As invoice] / [As Voucher] or pressing CTRL+V. The same can be done with a sales voucher to be brought up as an invoice
Display/Alter a Voucher/Invoice
You can display a voucher or alter it (subject to authority), by simply drilling down any display screen.
For example, from the Balance Sheet, press Enter on the group Sundry Debtors, then on the particular ledger, which brings up its monthly summary. Continue the selection process till you see the list of vouchers and then the voucher itself. You may to alter a voucher by going through the ledger display screen or the Day Book.
Note: If you do not have the authority to alter a voucher, the voucher would be brought up for display only.









No comments:
Post a Comment